Author Archives: admin

Kawasaki Jet Ski Restoration

Post Created October 2014.

1988 Jet Ski 550 Kawasaki Restoration Before, Mobile OnCall Mechanic, Wichita KS
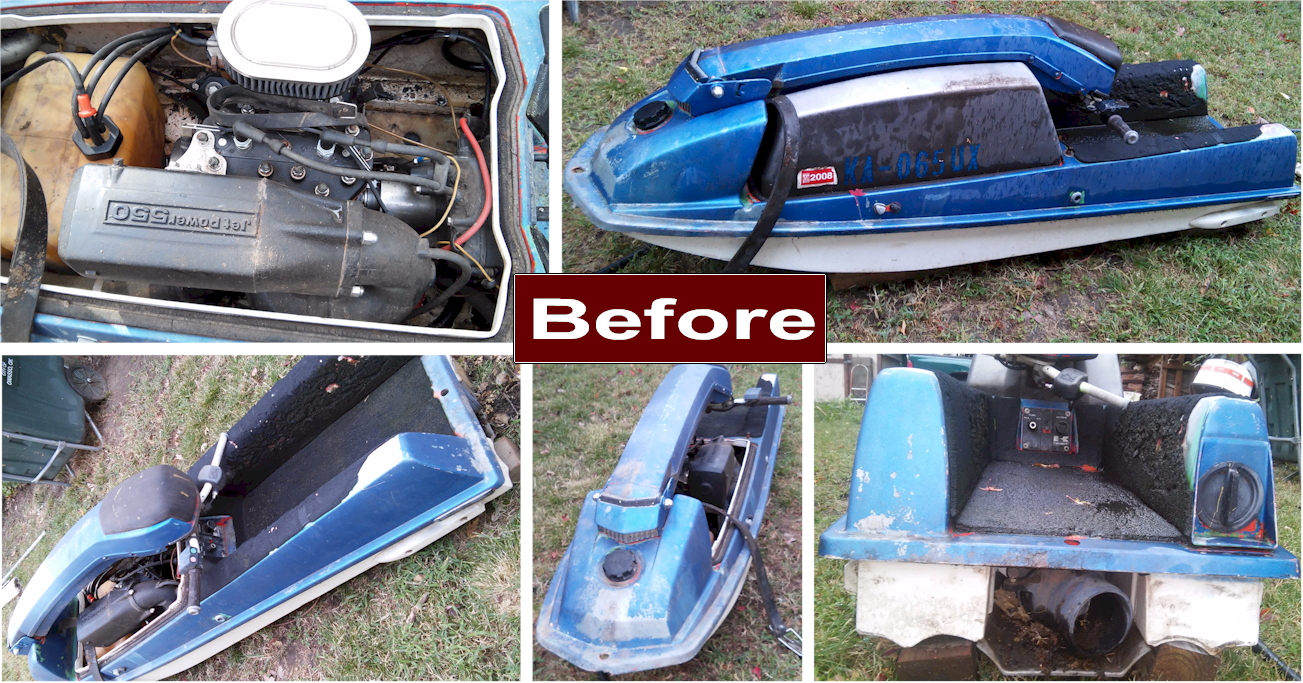
Hi, this is my first personal water craft, a 1988 Kawasaki Jet Ski.  Picked it up for $25.  I plan a total restoration with everything tended to.  I quickly learned that working on PWC’s is NOTHING like boats!  You need lots of special tools and lots of patience.  You would think that such a small craft would be easy but think again!  For example, 3 things right off:  First, the hull is Sheet Molded Compound “SMC”, not fiberglass, so you must use epoxy resin not polyester.  Second, the motor is about the same size as a typical powerhead on a boat more, but that’s where the similarities end!  Forget about rebuilding the crankshaft yourself.  Third, the jet drive requires lots of knowledge and special tools.  I will call this a “learning experience” and it has already been at least partially rewarding in that I successfully completely disassembled the motor.  In the end I will hopefully gain knowledge to help other Jet Ski owners.

The crankshaft is bad, you can’t even turn the front main bearing.  I will shift focus back to the body while I hunt for a new crank (or a suitable rebuilder) this winter.  Note to self: Approach with caution, the motor can explode with an improperly aligned crankshaft, because of runout.

Take a good look at this photo, you will not believe your eyes when I’m finished!

Battery & Starter

I see this ALL THE TIME:  Folks call me out to “change the starter” (and sometimes they have already bought the starter) and all the vehicle needs is a BATTERY!!  Try a JUMP START before just assuming that you need a starter!  Cheers.

RV Roof Air Leaking / Not Cooling

If you have water coming inside your recreational vehicle or it isn’t cooling, it probably needs a good cleaning.

Leakage:
Most roof air conditioners have drain holes in the pan that the compressor sits in, but frankly there is not enough of them and they are not large enough!  With this in mind, know that they will clog.. and pretty darn easy.

Make sure that your RV IS NOT plugged in.

Go up on your roof.  TIP: I like to lay a couple of 2X4’s across the roof so the center isn’t having to support my fat butt!  RV roofs can typically consist of 1X2 construction and that won’t support much!  Also.. alot of times this core lumber is held together with staples or brads!!

Remove the plastic cover.  This is usually held with 4 nuts (sometimes the bolts are attached to the frame of the A/C so make sure you don’t damage the studs!).

After you remove the cover you will notice lots of leaves, dirt and branches among other things.  Get a hose and gently wash that stuff out (you can damage something with too high of water pressure, use you hand or a brush to get the big clumps out).

As mentioned there are drain holes.  Inspect them.  Chances are they are 1/4″ and sometimes there may be as few as 1 or 2 drain holes.  I like mine to be 1/2″ and have a minimum of two in the rear AND two alongside the middle (one end will stay moistly dry but you may consider another hole in or near the center).

Be VERY CAREFUL when drilling holes in the pan.  It will be a heavy steel pan and you will have to push down somewhat.  I like to start with a very small pilot hole first.  MAKE SURE that you don’t drill through the roof!!!  Drill bit stops are a good idea.

Before you replace the plastic cover, you should clean the fins.

Not cooling:
Coming Next: Cleaning the Evaporator and Condenser Coils (fragile fins).

Chrysler Dodge Minivan Serpentine Belt

We have had requests for 3 of these lately.  Frankly I have always been used to installing belt(s) from under the hood, not so much with Chrysler Minivans!

I am sure people are wondering “what the heck” when their belt comes off or breaks because looking just under the hood will get you nowhere.

Tip: If you have an underlying problem related to a pulley then your belt will come off (bad water pump, power steering pump, idler pulley).  If you notice that your belt has come off, and not broke, then most-likely there is another issue and re-installing the belt will typically just throw it again.  If however your belt has broke then chances are it’s just the belt.

Ok, so back to the under-the-hood part.  Unlike most other vehicles I have worked on, these particular ones have access to the belt tensioner underneath the vehicle, passenger side.  You have to remove the dust cover (2 or 3 bolts AND 4 or 5 of those little plastic plunger body panel retainers which should be replaced).

After you remove the dust cover you will see the tensioner along with the rest of the front of the engine (although it’s in there sideways).

Now the trick is going to be actually getting the tensioner to move.  Some have a tab, others have a nut.. either way you will need a big wrench or a long special tool (this will require metric wrenches).

There will be no room for a ratchet so forget that idea!

On the ones with a tab, there is a big square area to place your wrench (which will be a 17 or 19mm).  For the ones with a nut it will most-likely be a 15mm.  Note: The ones with a 15mm nut technically call for an extra long special wrench which is just a flat piece of steel with a 15mm hole in it.  You can get around this by sliding the closed end of your wrench over the open end of the 15 mm wrench, this gives you a long tool.

Tip: The book says route the belt over everything except the tensioner, this is wrong.  You can barely get it there at all, let alone with a wrench there!  Route the belt over everything including the tensioner and leave it off of the bottom engine pulley and save that one for last.